
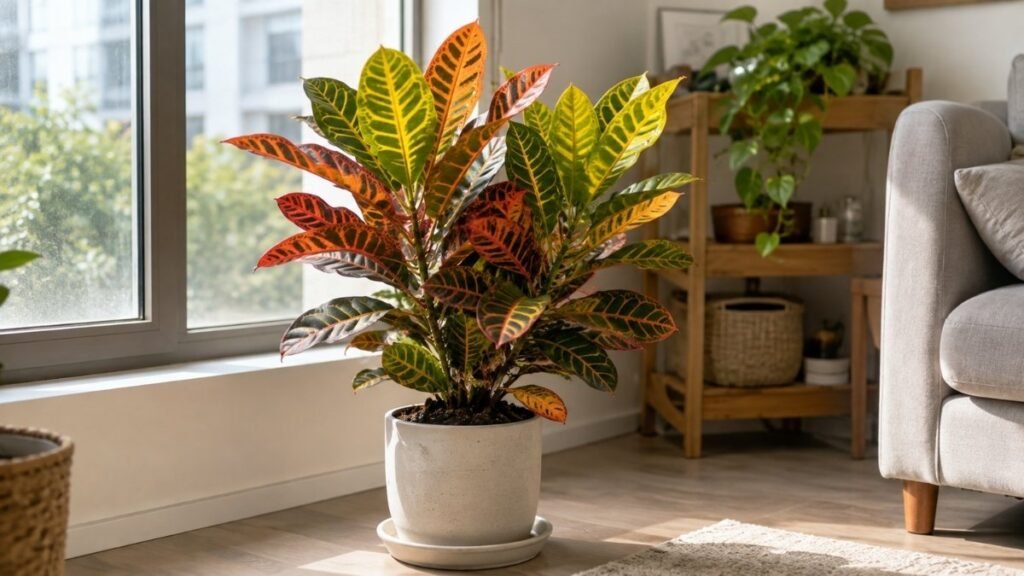
Crotons can be a little dramatic. I still remember how alarming it felt the first time one suddenly dropped several leaves after being moved. But over time, I learned that good croton plant care is less about doing more and more about keeping things steady.
Give your croton bright light, sensible watering, and a warm, stable spot, and most problems become much easier to manage. In this guide, I’ll walk you through the simple basics that help crotons stay colorful and healthy without expensive equipment or complicated routines.
Quick Answer
Here’s what a croton actually needs, at a glance:
- Light: Bright indirect light, with some gentle direct sun tolerated well.
- Water: Check soil moisture before watering — skip the fixed schedule.
- Temperature: Warm and stable; protect from cold drafts and AC/heater airflow.
- Humidity: Moderate to higher humidity preferred, but no expensive equipment required.
- Soil: A well-draining indoor potting mix, in a pot with drainage holes.
- Repotting: Don’t rush to repot a newly purchased croton.
- Safety: The milky sap can irritate skin — keep the plant out of reach of pets and young kids.
Crotons are a moderate difficulty plant, not a beginner-easiest option — but that’s very manageable with a bit of attention. Try not to move the plant around too often. Sudden leaf drop doesn’t automatically mean the plant is dying. And if the color starts fading, more fertilizer is almost never the fix.
Is Your Home a Good Fit for a Croton?
Those colorful red, orange, and yellow leaves are hard to resist, but crotons do best when the spot is right from the start. Before bringing one home, check three basics: light, warmth, and a stable place away from drafts. A home that offers those conditions gives a croton a much better chance to settle in and stay healthy.
Are Crotons Difficult for Beginners?
Crotons sit at a moderate difficulty level — not the easiest houseplant out there, but far from unmanageable. Their reputation for being “dramatic” mostly comes from how visibly they react to environmental change, which can feel alarming if you don’t know what’s happening. Once you understand that reaction pattern, caring for one becomes much less stressful.
Does Your Home Have the Basic Conditions a Croton Needs?
Crotons need at least one genuinely bright spot — think a spot close to an unobstructed window, not just “a room with some light.” They also want reasonably warm, stable indoor temperatures, and some protection from cold drafts and strong airflow from air conditioning or heating vents. If your home can offer that combination, a croton is a realistic choice, apartment or not.
Here’s a mistake that’s easy to make without realizing it: picking a croton specifically for a dim decorative corner because the foliage looks so colorful and lively in the store. That vivid color is exactly what tends to fade first when a croton doesn’t get enough light — so a plant chosen for a dark spot often ends up disappointing the person who chose it, through no fault of their own.
Are Crotons Safe Around Pets and Children?
Crotons are considered toxic if ingested, and their milky sap can irritate skin on contact. If you have pets or young children who might reach a plant on a low shelf or windowsill, keep this in mind when choosing a spot — or consider a different plant if a genuinely safe location isn’t available.
“Will a Croton Work in My Home?” Self-Check
- [ ] I have at least one spot with genuinely bright light
- [ ] My home stays reasonably warm and doesn’t have major temperature swings
- [ ] I can keep the plant away from cold drafts and vent airflow
- [ ] Pets and young children won’t have easy access to the plant
- [ ] I’m comfortable with a plant that reacts visibly to change
A croton is a realistic choice when your home offers a bright, warm, stable spot that pets and young children can’t easily reach.
What to Do During Your Croton’s First 30 Days
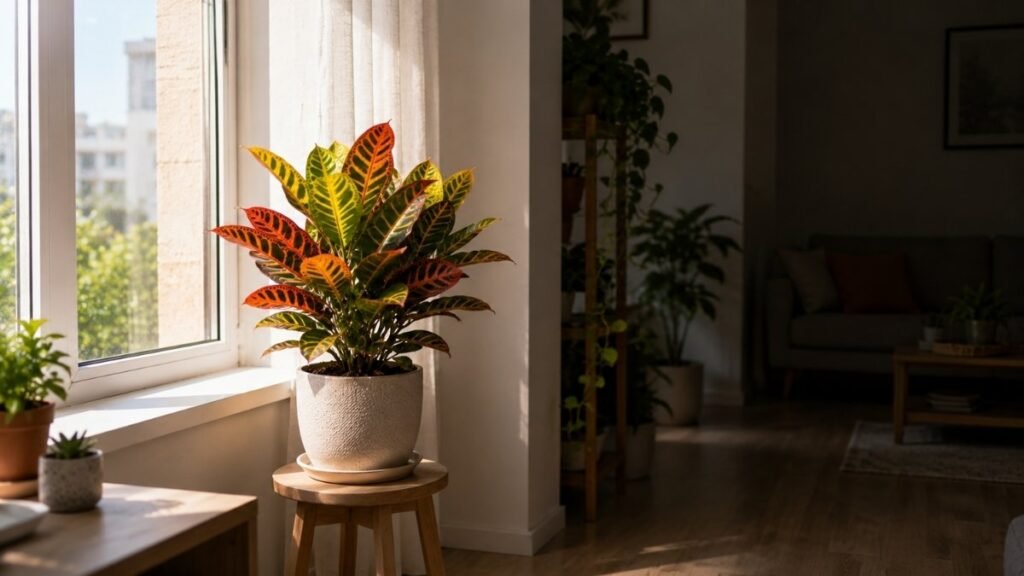
During the first few weeks, I focus on giving it a bright, warm spot, checking the soil before watering, and letting it adjust without too much fuss.
Day 1: Inspect and Choose a Stable Spot
Before placing a new croton near your other plants, give it a quick once-over for pests, particularly on leaf undersides. Choose one suitable location — bright, warm, away from drafts — and plan to leave it there rather than moving it around while you figure things out.
Weeks 1–2: Let Your Croton Adjust
Check soil moisture before watering rather than watering automatically just because the plant is new. This isn’t the moment for fertilizer either — your croton is adjusting to a new environment, and added nutrients won’t speed that up. If conditions are otherwise fine, it’s also worth waiting roughly 2–3 weeks before considering any repotting.
It’s genuinely common for a croton to drop a few leaves during this window, whether it came from a supermarket display, a garden center, a clearance rack, or arrived as a gift or delivery. A little adjustment-related stress doesn’t necessarily call for immediate action — sometimes the most useful thing you can do is watch and wait.
Weeks 3–4: Transition Into Normal Care
By this point, you can start easing into your regular care routine — the watering, light, and feeding practices covered later in this guide. The single most useful habit during this whole first month: change only one thing at a time. Adjusting light, water, soil, and location all at once might feel proactive, but it makes it nearly impossible to figure out later what actually helped or hurt.
“New Croton: First 30 Days” Checklist
- [ ] Inspected for pests before placing near other plants
- [ ] Chose one stable location and stuck with it
- [ ] Checked soil moisture before first watering
- [ ] Held off on fertilizer during acclimation
- [ ] Waited before considering repotting
- [ ] Changed only one care variable at a time
The safest first-month strategy is usually to pick a good spot, observe carefully, and resist changing everything at once.
Croton Light Requirements: Keeping Those Colors Bright
In a dim spot, those rich reds, oranges, and yellows can gradually fade into green. Give it plenty of bright light, and the foliage has a much better chance of keeping the bold colors that make crotons so eye-catching.
What Does Bright Indirect Light Mean for a Croton?
In practice, this means a spot close to a window with plenty of natural light, but without harsh, direct rays hitting the leaves for hours at a time. It’s worth calling out a common misconception here directly: “bright indirect light” does not mean a croton can thrive several feet back in a dim room, even if that spot technically gets some daylight. Plant care labels often understate just how much light crotons actually want, which leads a lot of beginners to underestimate their needs.
Can Crotons Handle Direct Sunlight?
Yes, to a point. Gentle direct sun — especially morning light — is generally well tolerated and even helpful for maintaining color. Intense afternoon sun is a different story and can scorch leaves if the plant isn’t gradually acclimated to it. If you’re increasing your croton’s light exposure, do it in small steps rather than moving it straight from a shaded spot into full afternoon sun.
Why Is My Croton Turning Green?
Increasingly green foliage, or fading red, orange, and yellow tones, is one of the clearest signs of insufficient light. New leaves also naturally take a little time to develop their mature coloration, so don’t panic over a single pale new leaf — the pattern to watch for is a broader, ongoing shift toward green across the whole plant.
It’s tempting to reach for fertilizer when color starts fading, but that’s usually treating the wrong problem — light is worth ruling out first. It’s also worth resisting the urge to repeatedly move the plant around chasing better sun; frequent relocation creates its own stress, on top of whatever the lighting issue actually was.
| Condition | What It Looks Like | What’s Happening |
|---|---|---|
| Insufficient light | Fading color, increasing green tone, leggy growth | Not enough light to maintain pigmentation |
| Healthy light | Bold red/orange/yellow coloration, compact growth | Light levels well matched to the plant |
| Excessive direct sun | Scorched, bleached, or crispy patches | Sudden or prolonged intense sun exposure |
For more on reading light conditions around your home in general, our guide on how to understand light from different window orientations can help you match rooms to plants more confidently.
How to Water a Croton the Right Way
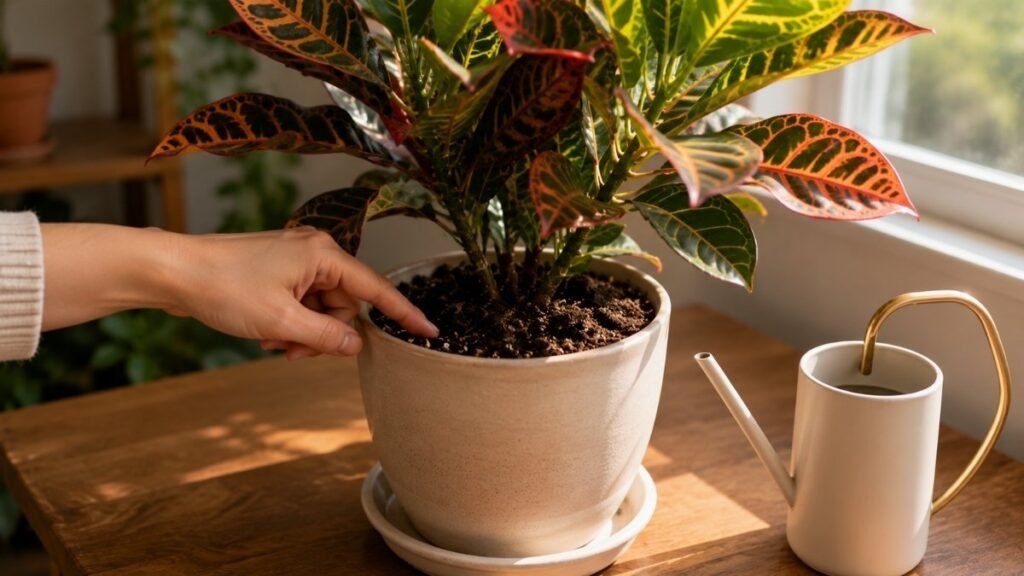
Crotons like evenly moist soil, but they don’t enjoy sitting in soggy soil. Instead of watering on the same day every week, check the soil first.
How to Tell When Your Croton Needs Water
Skip the “every seven days” approach — check the soil instead. When the top inch or two feels dry, it’s a reasonable time to water; if it still feels damp, hold off and check again in a day or two. When you do water, water thoroughly, and make sure any excess drains out rather than sitting in a saucer or decorative outer pot.
What Does Croton Wilting Mean?
Wilting or drooping can mean the plant is genuinely thirsty — but it can just as easily mean the soil has been kept too wet for too long. This is exactly where a common beginner cycle starts: leaves drop, the assumption is drought, more water gets added, and the roots end up sitting in consistently soggy soil, which only makes things worse. Leaf drop on its own is not a reliable signal that your croton needs water — check the soil directly before reaching for the watering can.
How Watering Changes With the Seasons
Light, temperature, pot size, and season all affect how quickly soil dries out. During cooler or darker months, when growth naturally slows, most crotons need less frequent watering than they do during their active growing season.
Five-Step Pre-Watering Check
- [ ] Feel the top 1–2 inches of soil for moisture
- [ ] Check that the pot has drainage holes
- [ ] Confirm the saucer or outer pot isn’t holding standing water
- [ ] Consider recent light and temperature conditions
- [ ] Water thoroughly only if the soil actually feels dry
If you’re noticing signs that could go either way, our guide on how to fix an overwatered plant walks through how to tell the difference and correct course.
Temperature and Humidity for a Healthy Croton
A warm, steady spot away from cold drafts and blasting vents usually matters more than trying to create the perfect tropical environment.
Keep Temperatures Warm and Stable
Crotons prefer warm, relatively consistent temperatures and don’t love sudden swings. Common trouble spots in an ordinary home include cold windows in fall and winter, direct airflow from air conditioning or heating vents, and drafty exterior doors. If your croton spent the summer outdoors, bringing it back in for the cooler months is a genuinely common source of stress — a plant that was thriving in August can look quite unhappy a few weeks after an abrupt indoor transition, even though nothing is fundamentally wrong with it.
Simple Ways to Improve Humidity
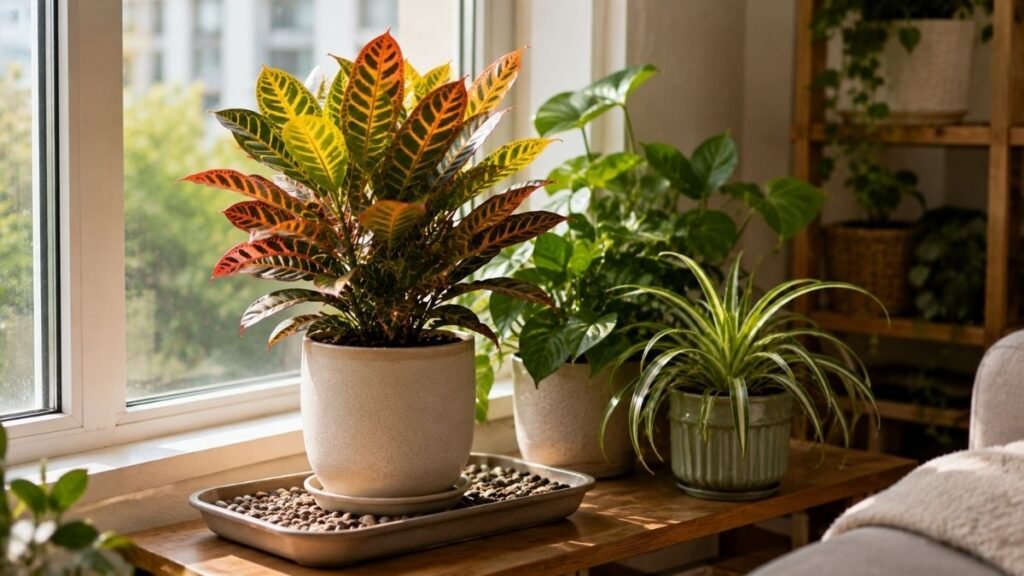
Crotons appreciate moderate to higher humidity, but dry heated air indoors — especially in winter — can work against that. A few low-cost adjustments go a long way: grouping plants together to create a slightly more humid pocket of air, using a pebble tray with water beneath (not touching) the pot base, or placing the plant in a naturally humid spot like a bathroom, as long as it still gets adequate light. A humidifier can genuinely help if these simpler steps aren’t enough, and an inexpensive thermometer/hygrometer is a useful way to actually know what conditions your plant is dealing with, rather than guessing.
Winter vs. Summer Croton Care
| Adjustment | Summer | Winter |
|---|---|---|
| Watering frequency | More frequent, active growth | Less frequent, slower growth |
| Temperature risk | Generally stable | Cold drafts, windows, exterior doors |
| Humidity | Often naturally higher | Often lower due to heating |
| Placement | More flexible | Keep away from vents and cold glass |
Crotons usually benefit more from stable warmth and avoiding harsh drafts than from trying to engineer perfect tropical humidity.
Best Soil, Pots, and Repotting for Crotons
Croton roots do best in a loose, well-draining potting mix with plenty of airflow. A pot with drainage holes helps excess water escape and keeps the soil from staying soggy for too long. Repotting only needs to happen when the plant has actually outgrown its current pot.
What Soil Is Best for Crotons?
Crotons want soil that drains well but still holds some moisture, with decent aeration around the roots. You don’t need a specialty croton-specific mix — a standard indoor potting mix, improved with a bit of perlite or orchid bark if it seems dense, works perfectly well and keeps costs down.
How to Choose the Right Pot
Always choose a container with drainage holes — this one detail prevents more root problems than almost anything else in this guide. Size the pot to the plant rather than sizing up “for the future,” since an oversized container holds more soil, which stays wet longer and raises the risk of consistently soggy roots. As crotons mature, they can also become fairly top-heavy; a heavier or more stable pot style helps prevent tipping, and a low-cost weighting trick (like a layer of gravel at the base) can stabilize a lightweight decorative outer container.
When Should You Repot a Croton?
Genuine signs it’s time include roots circling tightly at the base, water running straight through without being absorbed, or a plant that’s clearly outgrown its container. Cosmetic preference alone — simply wanting a nicer-looking pot — isn’t really a reason to repot, especially soon after bringing a new plant home, since the process itself creates some stress. When you do repot, aim to minimize root disturbance, and time it around the plant’s condition rather than your own convenience.
How and When to Fertilize a Croton
During active growth, an affordable balanced general-purpose houseplant fertilizer, applied according to the product’s dilution directions, is all a croton typically needs. Ease off or pause feeding when growth naturally slows, and avoid the temptation to over-feed. One important point worth repeating: fertilizer is not a rescue treatment. A severely stressed plant needs its underlying problem addressed first — adding fertilizer on top of stress usually does more harm than good.
“Repot Now or Wait?” Decision Checklist
- [ ] Roots are visibly circling or emerging from drainage holes
- [ ] Water runs through without being absorbed
- [ ] The plant is clearly too large for its current pot
- [ ] It’s been at least a few weeks since the plant came home
- [ ] The plant is otherwise healthy, not currently stressed
Good drainage and sensible timing matter far more than expensive soil, oversized decorative pots, or frequent repotting.
Why Is My Croton Dropping Leaves?
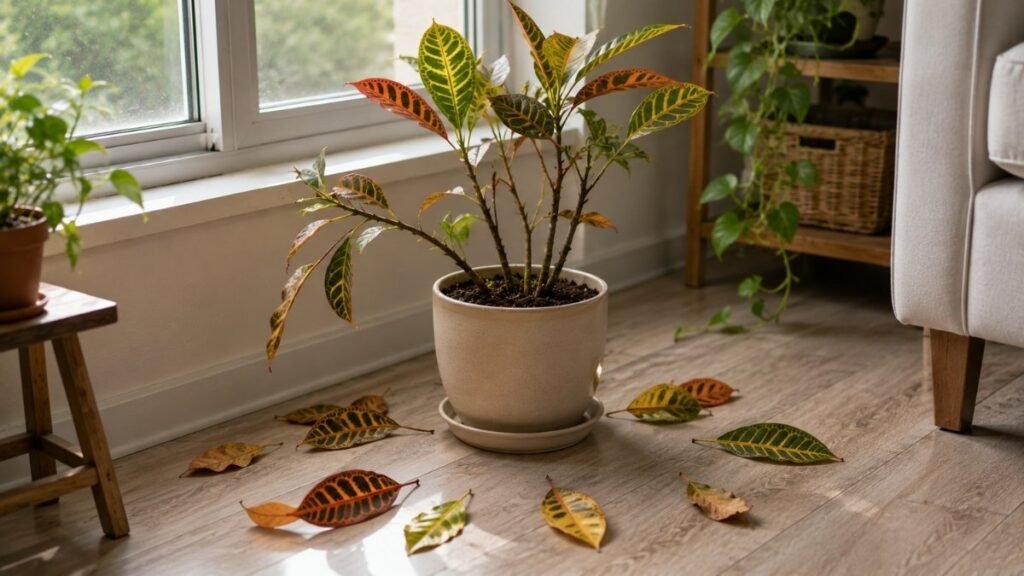
Few things are more frustrating than watching a healthy-looking croton suddenly lose its leaves. The good news is that leaf drop often has a clear cause. Start with what changed recently, then work from there.
What Changed Before the Leaves Started Falling?
This is always the right starting question. Common triggers include a recent purchase or move, frequent relocation within the home, repotting shock, a sudden temperature change or cold draft, a major shift in light exposure, underwatering, persistently wet soil, or pests. Occasional loss of a few older, lower leaves is also just normal aging and not cause for concern on its own.
Is a Leafless Croton Dead?
Not necessarily. A croton that’s lost most or all of its leaves can still be alive if the stems remain firm and green or pliable underneath, rather than brittle, black, or mushy. Checking the soil, stems, any remaining foliage, and recent environmental changes together gives a much clearer picture than focusing on the leaves alone.
How to Help a Stressed Croton Recover
Once you’ve identified the likely cause, address that one thing rather than changing the watering, light, location, and feeding all at once — layering multiple interventions makes it much harder to tell what actually worked. If the stems are still healthy, recovery is often possible, though it can take patience and won’t necessarily show visible progress within days.
| Possible Cause | What to Check | First Action | What Not to Do |
|---|---|---|---|
| Recent move/purchase | Timing of leaf drop vs. arrival | Choose a stable spot and wait | Don’t relocate again immediately |
| Cold draft/temperature shock | Proximity to windows, vents, doors | Move away from the draft source | Don’t compensate with extra water |
| Underwatering | Soil dryness, wilting | Water thoroughly, resume normal checks | Don’t drench repeatedly “just in case” |
| Overwatering/wet soil | Soil moisture, drainage, odor | Let soil dry appropriately, check drainage | Don’t add fertilizer to “help” |
| Major light change | Recent change in placement | Adjust light gradually, not abruptly | Don’t move the plant repeatedly |
| Pests | Leaf undersides, stems | Inspect closely, isolate if found | Don’t ignore early signs |
Sudden leaf drop is a symptom rather than a diagnosis — figure out what changed before deciding how to respond.
Croton Leaf Problems: A Quick Symptom Checker
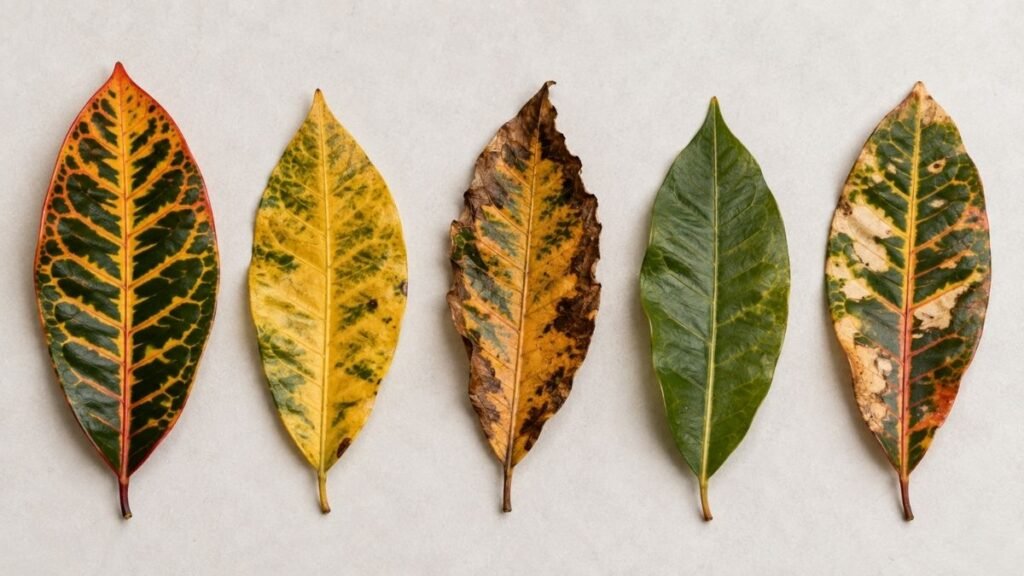
Yellow leaves, brown edges, fading color, and drooping can all point to different problems. Use the symptoms below to narrow down the likely cause and decide what to check first before changing your care routine.
| What You See | Most Likely Causes | Check This First | Read Next |
|---|---|---|---|
| Yellow leaves | Overwatering, natural aging, nutrient issues | Soil moisture | Watering section |
| Brown, crispy edges | Underwatering, low humidity, salt buildup | Soil dryness, humidity | Watering / Humidity section |
| Wilting or drooping | Underwatering or overwatering | Soil moisture | Watering section |
| Scorched or bleached patches | Sudden intense direct sun | Recent light changes | Light section |
| Pale or fading color | Insufficient light | Distance from light source | Light section |
| Increasingly green foliage | Insufficient light | Placement relative to windows | Light section |
| Speckling or stippling | Possible pest activity | Leaf undersides | Pest section |
One useful habit worth building early: don’t diagnose your croton from a single leaf. Soil condition, recent placement changes, and the pattern across multiple leaves together usually paint a much more reliable picture than any one symptom on its own. For a broader look at yellowing specifically across houseplants, our guide on plant leaves turning yellow covers the topic in more depth.
Spider Mites and Other Common Croton Pests
Crotons can attract spider mites, mealybugs, and other small pests that are easy to miss at first. A quick look under the leaves and around new growth each week can help you catch trouble early, before it spreads through the plant.
How to Spot Spider Mites Early
Spider mites are the pest most likely to bother an indoor croton, with mealybugs also fairly common. Check leaf undersides, stems, petioles, and new growth regularly — this is where problems tend to start before they become visible from a normal viewing angle. Watch for fine webbing, speckled or stippled foliage, or cotton-like or sticky residue.
A Simple Weekly Pest-Prevention Routine
Wiping broad croton leaves periodically with a damp, soft cloth — an old T-shirt works just as well as anything you’d buy — helps remove dust and catches small pest problems early, without needing leaf-shine products, which usually aren’t necessary. It’s a genuinely common experience for pests to go unnoticed until visible damage is already fairly severe, simply because most people judge plant health from the colorful upper leaf surface rather than checking underneath.
What to Do If You Find Pests
If you spot pests, isolate the affected plant from your other houseplants right away to prevent spread. Treatment should scale with severity — a few early-stage mites might just need consistent wiping and monitoring, while a heavier infestation may call for a targeted treatment. Either way, go gently on a plant that’s already stressed from other causes; piling on an aggressive pest treatment while the plant is struggling for other reasons can do more harm than good.
60-Second Weekly Croton Pest Check
- [ ] Check leaf undersides for webbing or residue
- [ ] Check stems and petioles
- [ ] Inspect new growth closely
- [ ] Wipe leaves with a damp cloth
- [ ] Isolate immediately if pests are found
Frequent quick inspections are easier, cheaper, and less stressful for the plant than treating a large, established infestation.
How to Prune a Leggy Croton for Bushier Growth
Pruning can help reshape a healthy plant and encourage new branches, giving it a fuller, more balanced look over time.
Is a Bare Lower Stem Normal?
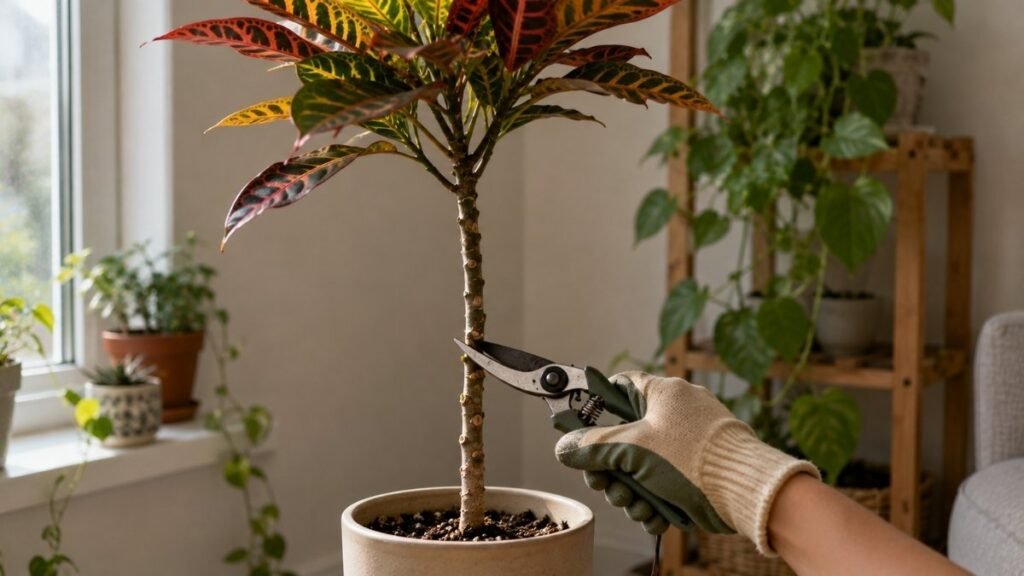
Yes, often. Crotons naturally develop a somewhat tree-like form over time, with older lower leaves dropping as the plant matures — this isn’t automatically a sign of poor care. That said, if the bare stem came with other stress signals, it’s worth ruling those out using the troubleshooting sections above.
Where Should You Cut a Leggy Croton?
The best timing for substantial pruning is typically during active growth, rather than while a plant is already stressed. Make cuts at a point where you’d like new branching to develop — cutting encourages growth below the cut point, which is how a single bare stem can gradually turn into a fuller, bushier plant.
How to Encourage New Branches
After pruning, you may end up with a temporarily bare stem topped by remaining foliage — that’s a normal in-between stage, not a failed attempt. New branches typically emerge below the cut over the following weeks, though the exact timeline varies by plant and season.
A few practical notes: use clean cutting tools, and wear gloves — croton sap is milky and can irritate skin, so it’s worth protecting your hands (and covering nearby furniture or fabric) while you work.
Can You Propagate Croton Cuttings After Pruning?
Optionally, yes. Healthy, pest-free cuttings can be rooted in water or soil, given warmth and suitable light, and potted once roots are established. This is a nice bonus rather than a required part of croton care — if you’re interested in going deeper, a dedicated propagation guide is worth exploring separately.
Safe Croton Pruning Checklist
- [ ] Prune during active growth, not while the plant is stressed
- [ ] Use clean, sharp tools
- [ ] Wear gloves to avoid skin irritation from sap
- [ ] Protect nearby furniture or fabric
- [ ] Cut just above a point where you want new branching
- [ ] Be patient — new growth takes time to appear
A bare lower stem can be completely normal, and thoughtful pruning can reshape a healthy croton without treating its natural growth habit as a problem.
Frequently Asked Questions
Why is my croton dropping all of its leaves all of a sudden? Sudden leaf drop usually follows a specific change — a recent move, a cold draft, a big shift in light, watering issues, or repotting stress. Start by asking what changed recently, since that’s almost always the fastest route to the real cause.
How much light does a croton actually need to keep its bright colors? Crotons need genuinely bright indirect light, and they tolerate some gentle direct sun well, especially in the morning. Too little light is one of the most common reasons a croton’s color fades or turns increasingly green.
How can I fix a tall croton that lost its bottom leaves and looks bare? A bare lower stem is often just natural growth, not a problem to fix. If you want a fuller shape, prune during active growth at the point where you’d like new branches to form — new growth typically appears below the cut over the following weeks.
How often should I water my croton plant? There’s no fixed schedule — check the top inch or two of soil first, and water thoroughly only when it feels dry. Watering frequency will naturally shift with the seasons, light levels, and pot size.
Should I repot my new croton right away? No. It’s generally best to wait roughly 2–3 weeks and let a newly purchased croton settle into its environment before considering a repot, unless there’s an urgent drainage or root problem.
Is it true that moving a croton around will stress the plant? Yes, frequent relocation is a common source of stress for crotons, since they respond noticeably to environmental change. Choosing one suitable spot and leaving the plant there is usually the better approach.
How do I protect my croton from pest infestations like spider mites? Check leaf undersides, stems, and new growth weekly, and wipe leaves periodically with a damp cloth. Catching pests early, before an infestation becomes established, makes treatment far simpler.
Are croton plants toxic to pets and children? Yes, crotons are considered toxic if ingested, and the milky sap can also irritate skin. It’s worth placing the plant somewhere pets and young children can’t easily reach.
🌿 Garden Notes: The Thinking Behind This Guide
Crotons can test your patience. One week the leaves look bright and glossy; the next, a few are on the floor and you’re wondering what went wrong.
That’s why this croton plant care guide focuses on the problems home growers actually face, rather than trying to create perfect greenhouse conditions.
We built the guide around three simple ideas:
- ☀️ Give It the Right Light — Enough brightness to keep those beautiful colors from fading.
- 💧 Water With the Soil, Not the Calendar — Check first, then water when the plant actually needs it.
- 🌿 Keep Things Steady — Crotons tend to do better with consistent warmth, light, and care than constant adjustments.
You don’t need to get every little detail perfect.
Give your croton a good spot, pay attention to what it’s telling you, and give it time to settle in.
🌿 Continue Growing Your Indoor Garden
Getting your croton comfortable is just one part of building a healthy indoor garden. These beginner-friendly guides can help you care for your other houseplants and spot common problems before they become bigger ones.
- 🌿 Rubber Plant Care: Complete Guide — Learn the basics of light, watering, soil, and everyday care for a healthy rubber plant.
- 💛 Plant Leaves Turning Yellow? 7 Real Causes and Fixes — Find out what yellow leaves may be telling you and what to check before making changes.
- 🌱 Indoor Plant Care: The Complete Beginner’s Guide — Build a simple care routine that works across many of the most popular houseplants.
❤️ A Final Note
Every garden starts with a single seed and the confidence to grow it.
At DirtZip, we’re here to make gardening simple, practical, and enjoyable with beginner-friendly guides that help you grow healthier plants and avoid common mistakes.
Because every thriving garden begins with one small step.