There is a quiet, profound magic in watching a slimy banana peel, a handful of bitter coffee grounds, and a pile of crunchy autumn leaves transform into something that smells like a deep, ancient forest. For many of us, the first time we realize we can actually create our own compost, gardening stops being a weekend hobby and starts being a relationship with the earth.
Throwing away kitchen scraps feels a bit like tossing garden gold into the trash once you’ve seen what that “waste” can do for a struggling rose bush. But I know how it goes—for a beginner, starting a pile can feel like a high school chemistry project that’s destined to stink up the neighborhood. You worry about the “math” of nitrogen, whether you’ll wake up to a raccoon circus in your backyard, or if you’ll just end up with a pile of rotting garbage.
Take a deep breath. Composting is a natural process that wants to happen. My job is just to help you get out of the way and let the microbes do the heavy lifting.
The “Chemistry” Made Simple: Greens vs. Browns
You’ll hear folks talk about “Carbon-to-Nitrogen ratios,” but you can safely leave the calculator in the drawer. Think of your compost pile like a slow-burning campfire. To keep it going, you need fuel that burns hot and fast (Nitrogen) and fuel that provides a steady, long-lasting glow (Carbon).
- The Greens (Nitrogen/The Spark): These are your “wet” items. Kitchen scraps, fresh grass clippings that still smell like a mown lawn, and green garden prunings. They provide the protein microbes need to multiply like crazy.
- The Browns (Carbon/The Logs): These are your “dry” items. Shredded cardboard, brittle autumn leaves, straw, and even sawdust. These provide the energy and create the “fluff” that lets air move through the pile.
The golden rule I live by? Aim for about two or three handfuls of “Browns” for every one handful of “Greens.” If your pile starts smelling like a swamp, toss in more dry leaves. If it’s just sitting there looking exactly like it did a month ago, it’s “hungry”—feed it more greens.
What Most Gardening Guides Don’t Tell You
Most “how-to” articles make composting look like a clinical, odorless science experiment. Here is the reality most guides skip over:
- It’s going to get hot: A healthy pile can reach 140°F to 160°F. If you stick your hand near the center and feel heat radiating, you aren’t doing it wrong—you’re doing it perfectly.
- The “Micro-Herd” is doing the work: You aren’t actually rotting food; you are farming microscopic bacteria and fungi. Treat them like livestock—they need air, water, and food.
- It’s okay to fail: My first pile turned into a slimy, anaerobic mess because I dumped too many grass clippings in at once. I fixed it by adding a bag of shredded paper and flipping it. Compost is incredibly forgiving; you can almost always “reset” it.
The Squeeze Test: Checking the Pulse of Your Pile
One of the most important lessons I ever learned is that a compost pile is a living, breathing thing. If it’s too dry, the life inside goes to sleep; if it’s too wet, they drown.
To check if things are moving along, perform the “Squeeze Test.” Put on a glove, grab a handful of material from the dark, warm center of the pile, and give it a firm squeeze. It should feel like a wrung-out sponge—damp to the touch, maybe leaving a glistening drop or two on your palm, but not dripping.
If it’s bone-dry, give it a drink with the hose. If it’s slimy, mix in some shredded newspaper or dry straw to soak up the mess.
Step-by-Step: Your First 30 Days
1. Choosing Your Spot
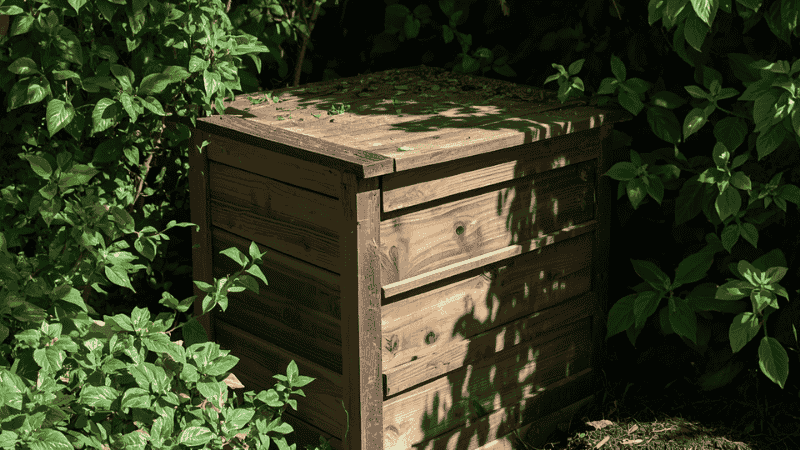
Find a level, well-drained spot. I’ve found that while a bit of sun helps “cook” the pile in the chilly spring, a spot in the dappled shade is better for the dog days of July so it doesn’t desiccate. You can go with a simple open heap, but if you have curious neighbors (or dogs), a tidy bin keeps things looking intentional.
2. The “Lasagna” Layering Method
Don’t just dump everything in a chaotic heap. Start with a 4-inch base of coarse Browns—twigs or straw work best—to let air circulate underneath. Then, alternate your layers. Every time I dump a bucket of wet veggie peels, I cover it with a thick, cozy blanket of brown leaves.
3. The First Turn
After about two or three weeks, you’ll notice the pile has slumped down. This is the fun part. Grab a pitchfork and flip the outside of the pile into the middle. Introducting fresh oxygen is like a shot of espresso for the microbes.
Optional Tools for Better Results
You can compost in a hole in the dirt, but a few things make the chore feel less like work and more like a hobby:
- A Breathable Kitchen Caddy: A dedicated scrap bucket with a charcoal filter in the lid is a lifesaver. It lets you collect scraps on the counter without the “old broccoli” smell wafting through the house.
- A Sturdy Pitchfork: Turning a pile is a workout. A high-quality fork with sharp, thin tines makes “fluffing” the pile much easier on your back.
- A Compost Tumbler: If you’re dealing with limited space or persistent raccoons, a tumbler makes the “turning” process as simple as spinning a prize wheel.
Real-Life Example: The Suburban Waste-Whiz
My friend Sarah lives in a tight suburban development. She was tired of her trash can smelling like a landfill by Tuesday, so she tucked a small compost bin behind her garage.
By simply diverting her food waste, she cut her household trash bags in half. More importantly, by the following spring, she had two wheelbarrows full of rich, crumbly “black gold.” She spread it over her tired flower beds, and for the first time in years, her hydrangeas didn’t just hang on—they put on a show. She saved nearly $100 on bagged “premium” soil just by recycling her morning eggshells and coffee grounds.
FAQ: The Quick Hits
Can I compost citrus? In moderation, sure. I wouldn’t dump a whole crate of lemons in at once because the acidity can slow down some microbes, but a few rinds won’t hurt a healthy bin.
Do I need “compost starter” pellets? In my experience, no. There are enough microbes on a single handful of garden soil or a blade of grass to start a colony. Save that money for a new pair of garden gloves!
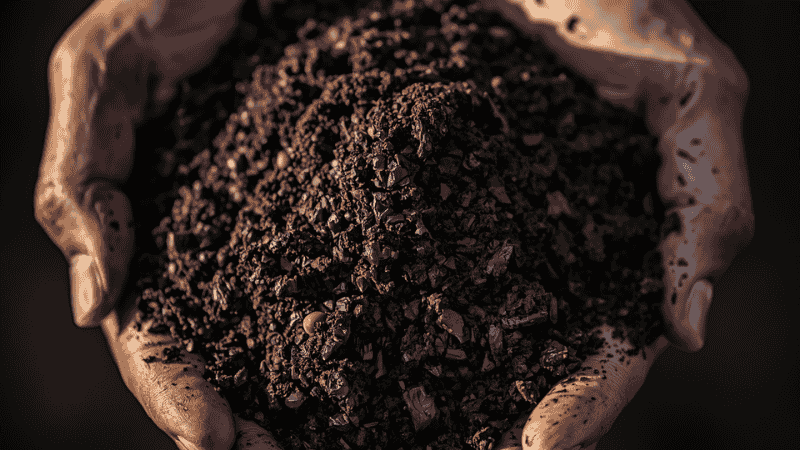
How do I know when it’s “done”? When it’s dark, crumbly, and you can’t tell what was a carrot and what was a leaf anymore, it’s ready. It should feel cool to the touch and smell like a fresh rain on a dirt path.
Can I put weeds in my compost? Only if your pile is “Hot Composting” (reaching over 140°F). If you have a “Cold Pile,” avoid weeds with seeds, or they will just sprout in your garden next year!
Why are there maggots in my bin? Usually, these are Black Soldier Fly larvae. They look a bit gross, but they are actually elite composters. If you want fewer of them, make sure your “Greens” are well-covered with “Browns.”
The “Lazy Gardener’s” Alternative
Then there’s my neighbor, Jim. Jim is a “set it and forget it” kind of guy. He has what we call a “Cold Pile”—he just heaps garden waste behind his shed and walks away.
It takes about a year for his pile to break down compared to my four months of active turning. But because he keeps a good mix of leaves in there, the bottom of that heap eventually turns into the most beautiful, dark earth you’ve ever seen. Composting doesn’t have to be a race; it can be as slow as you want it to be.
Starting a compost pile is an act of quiet optimism. It’s a way of saying that today’s scraps are the fuel for next year’s harvest. It connects you to the rhythm of the garden in a way that buying a bag of chemicals never can.
Would you like me to help you figure out which setup fits your yard best—maybe an indoor bokashi bin if you’re in an apartment, or a heavy-duty outdoor tumbler?