Your front yard is more than just a patch of grass you’re obligated to mow; it’s the “handshake” of your home. It’s that first greeting you get when you pull into the driveway after a brutal day at work, and it’s how your house says hello to the neighborhood.
When we start hunting for landscaping ideas, it’s so easy to get sucked into those glossy Pinterest boards of sprawling, million-dollar estates. But let’s be real: most of us just want a porch that feels inviting and a garden that doesn’t demand a sacrifice of every single Saturday morning.
I’ve spent more hours than I can count with my knees in the dirt, and if there’s one thing I’ve learned, it’s that a beautiful front yard isn’t about a massive credit card limit at the nursery. It’s about finally stopping the fight with nature and starting a conversation with it instead.
The “Secret” to Pro Design: The Power of Three
The biggest difference between a “DIY” look and a professional landscape isn’t the price tag—it’s repetition. It’s a hard lesson to learn when you’re at the garden center and every shiny leaf catches your eye.
But when you’re narrowing down your landscaping ideas, keep the “Power of Three” in mind. Instead of buying one of every “pretty” plant you see (which usually ends up looking like a messy flea market), pick three main colors or textures and repeat them across your beds.
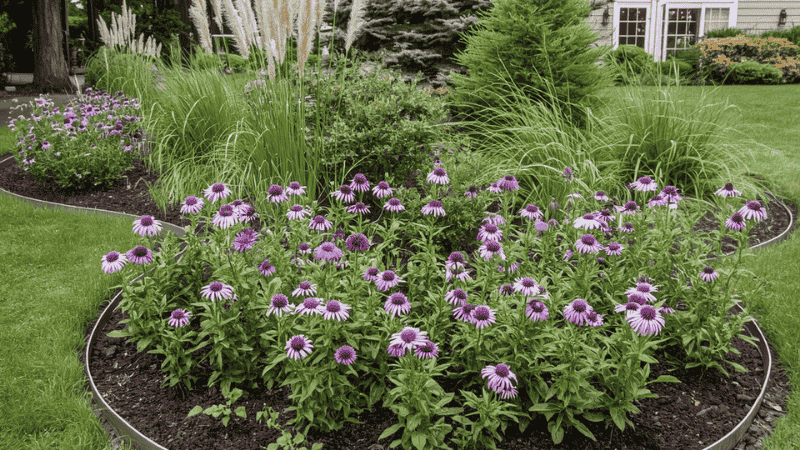
This creates a visual rhythm that actually calms the eye. For example, three clusters of purple coneflowers tucked next to three clumps of wispy, silvery ornamental grass makes the yard look intentional. It’s the secret to making a tiny suburban plot feel expansive and a big, wild space feel like someone actually lives there.
What Most Gardening Guides Don’t Tell You
Most “curb appeal” articles focus entirely on the day the plants go into the ground. Here is the reality of what happens next:
- The “Sleep, Creep, Leap” Rule: In the first year, perennials “sleep” while they grow roots. The second year, they “creep” a little. In the third year, they “leap.” If your yard looks sparse today, don’t overplant—year three is coming.
- Foundation Heat is Real: The soil right next to your house is often much hotter and drier than the rest of the yard because the foundation reflects heat. Those “full sun” plants might actually scorch if they are pinned against white siding.
- Maintenance is a Design Choice: If you hate pruning, don’t buy hedges. If you hate weeding, plant groundcovers tight together. You can design your way out of 90% of future yard work.
Step-by-Step Guidance: Transforming Your Canvas
Step 1: The Observation Phase
Before you grab a shovel and ruin your back, grab a cup of coffee. Stand on your porch and just watch. Where does the water puddle and turn into a muddy mess after a heavy April rain?
Does the sun bake the left side of your stairs until the soil cracks, while the right side stays mossy and chilly? The most brilliant landscaping ideas will fail miserably if you try to put a sun-loving lavender in a soggy, dark corner.
Step 2: Clearing the Canvas
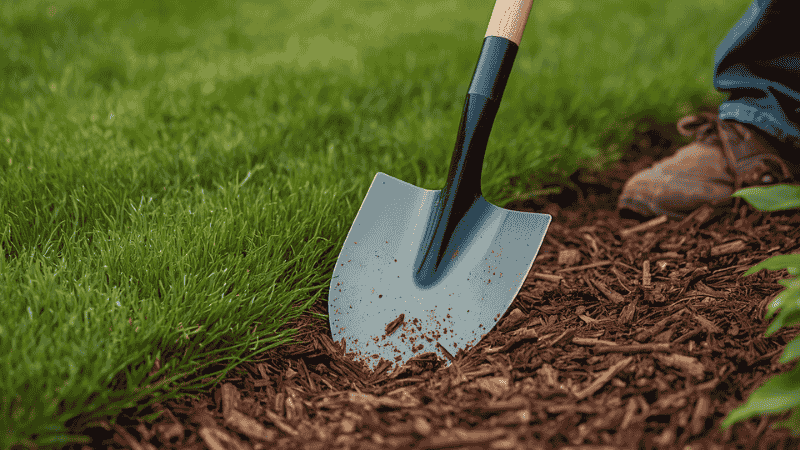
I’ll be honest: the prep work is the worst part. Hauling out old, patchy sod or yanking out those “builder-grade” shrubs that have turned into woody, leggy monsters is a genuine workout.
To save your sanity, I always tell people to skip the rounded garden spade and get a high-quality edging shovel with a flat blade. It slices through turf like a hot knife through butter, giving you those crisp lines that make your neighbors think you hired a pro.
Internal Link: Is your yard currently more “dirt” than “garden”? Read our guide:What is Soil? Understanding the Living Ecosystem Beneath Your Feet.
Step 3: Building the Skeleton
Start with your evergreens. These are the “bones” of your garden. They’re the only things that will keep your house from looking naked and depressing when the winter winds howl and everything else has turned into brown sticks. Once the evergreens are in the ground, you can have the fun of filling in the gaps with your perennials and soft groundcovers.
Optional Tools for Better Results
You don’t need a shed full of power tools, but a couple of specific ones make these landscaping ideas a lot less painful to pull off:
- A Quality Hori-Hori Knife: This is my “desert island” tool. When you’re planting dozens of small perennials, this serrated blade slices through compacted soil and stubborn roots way faster than any flimsy trowel.
- Heavy-Duty Steel Edging: If you want that “pro” look that lasts for decades, skip the plastic stuff. Steel edging stays put, handles a weed-whacker without chipping, and keeps grass roots exactly where they belong.
- Ergonomic Hand Pruners: Once things start growing, you’ll be doing a lot of “editing.” A pair of pruners that actually fits your hand will save you from that dull ache that follows an afternoon of clipping back flowers.
Real-Life Example: The 48-Hour Face-Lift
My neighbor, Julie, stared at her boring, flat lawn for five years because she thought a “real” makeover would cost ten grand. We finally decided to just tackle the entryway. We spent a Saturday morning carving out a deep, curved bed that followed the natural swing of her walkway.
We used steel edging to create a sharp border and planted three boxwoods for structure and a handful of Black-eyed Susans for a pop of yellow. By Sunday evening, her house looked entirely different. Total cost? Under $500 and a few sore muscles.
The “Mature Height” Mistake: A Foundation-Cracker in Disguise
Here is the “dirty truth” the big-box stores won’t tell you: that cute little shrub in the 1-gallon plastic pot is a teenager going through a growth spurt. I once saw a homeowner plant three Leyland Cypresses right under their front window because they looked like “tiny Christmas trees.”
Three years later, those trees were scratching the siding, blocking every bit of natural light, and the roots were eyeing the plumbing. Always, always read the tag. If it says “Mature Height: 10 feet,” trust it. Give your plants the room they need to breathe.
Internal Link: If your landscaping project involves reviving an old bed, you’ll need healthy soil. Check outHow to Start Composting: A Beginner’s Guide to Black Gold.
Real-Life Example: The Steep Slope Struggle
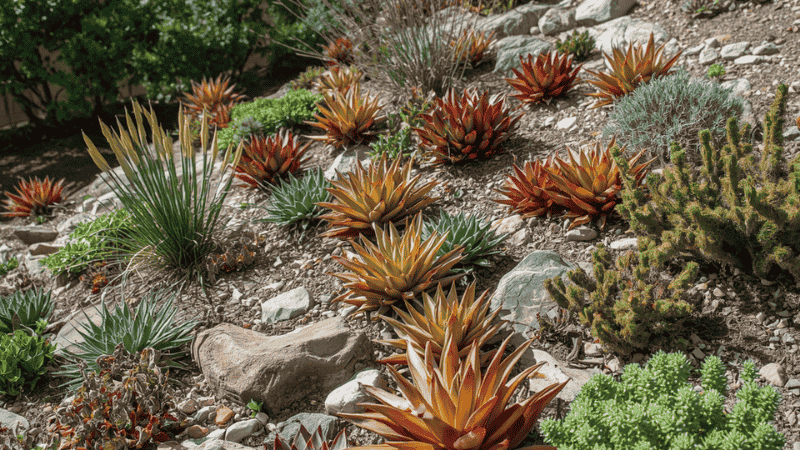
My friend Mark had this steep slope in his front yard that was a nightmare to mow and a total eyesore. He thought about terracing it with timber, but the quote made his eyes water.
Instead, we leaned into the “no-mow” life. We smothered the grass with mulch and planted “drifts” of creeping thyme and rugged ornamental grasses. These plants actually love the fast drainage of a slope. Now, instead of dragging a heavy mower up a hill, he has a waving, fragrant meadow that looks better every year with almost zero effort.
FAQ: Common Landscaping Questions
What is the best month to start landscaping? Spring is great, but early fall is actually my favorite. The soil is still warm from summer, but the air is cool, so the plants don’t get as stressed. It gives the roots a chance to get “settled in” before the ground freezes.
How do I landscape if I have a North-facing (shady) front yard? Don’t try to force sun-lovers to grow there; they’ll just look spindly and sad. Lean into textures. Hostas, Ferns, and Coral Bells come in wild colors—lime green, deep burgundy, and silver—and they thrive in the spots where grass gives up.
Do rocks or mulch look better? Personally? Mulch. It breaks down and actually feeds your soil, making your plants happier over time. Rocks can look clean, but they trap heat. In a hot July, those rocks can basically slow-cook your plant’s roots.
How do I keep weeds out of my new beds? The best defense is a thick layer of mulch (aim for 3 inches) and planting “tight.” Once your plants grow big enough to touch leaves, they shade the ground and keep those weed seeds from ever waking up.
What is the most low-maintenance front yard plant? For most of the US, it’s hard to beat ornamental grasses or native shrubs like Oakleaf Hydrangea. Once established, they basically take care of themselves.
The “August Burnout” Lesson
Then there’s James. James did everything right in May—his garden was a Pinterest dream. But James lived in a spot with brutal summer humidity. He didn’t use mulch, so he had to spend two hours every single evening dragging a hose around. By mid-August, he hated his garden.
The following year, we spread a thick 3-inch layer of straw mulch over the soil. It acted like a cool blanket, keeping the moisture in and the weeds down. James went from watering every day to watering twice a week. That one change moved him from “frustrated” to “feeding the neighborhood.”
Building a front yard you love is a journey, not a sprint. Every plant you tuck into the earth is a little bit of hope for the next spring. Start with one simple bed, get your hands in the dirt, and watch how a few solid landscaping ideas can finally turn your house into a home.
Would you like me to help you sketch out a quick plant list? Tell me if your front door faces the morning sun or that harsh evening heat.